Posts

Showing posts from 2012

How I made a Cocktail Ring with a Braided Band

Image
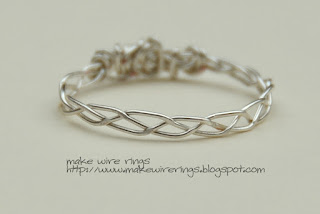
I didn't set out to make a cocktail ring - it just happened.  One of those ideas that just got bigger than I ever expected. I made this ring for a swap with one of the online jewelry groups I belong to.  The theme was 'Back to School'.  It was a tough theme, but I decided it reminded me of the turn of seasons from Summer to Fall. I love the way the band on this ring turned out.  I used a jump ring to start and folded the wires in half over it.  I think I started with 3 groups of 3 wires (9 wires) of equal size in 26g silver.  I put them through the jump ring and folded them in half.  Then I braided them to the length I needed to make a size 7 ring.  The braid came out really nice and neat.

Star Freshwater Pearl Ring

Image
I'm not sure why it's taken me so long to post this ring! It is one of my absolute favorites and I almost always sell it right off my hand - especially during the summer or winter holidays.

Herringbone Weave Gemstone Ring

Image
This ring style is so versatile!  It can be used with smooth or faceted round beads (up to 6mm), or regularly shaped flat coin style beads (up to about 10mm).  The bead size probably depends on the size of your fingers - but these are the stone sizes I found worked the best for me.

Silver Swirl Smoky Quartz Ring

Image
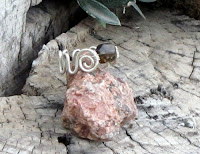
This ring design is from the book Beautiful Wire Jewelry for Beaders: Creative Wirework Projects for All Levels by Irena Miech.  It is made with 16g silver wire for the ring shank and a smoky quartz focal bead that is attached with 24g wire. The book gives the basic technique, but I found the measurement information confusing, so I just winged it.

Gemstone Flower Ring

Image
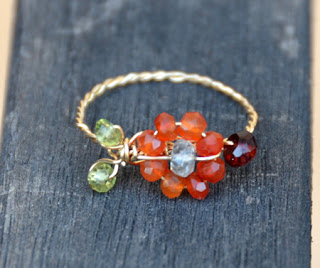
I have been playing with these gemstone flowers in earring designs for several months now and I still can't get enough of them.  I think they remind me of the daisy chain flowers I used to make as a kid - but they seem sophisticated and fun in gemstones. The flowers are so easy to make, but the ring connection on the back could use a little bit of work.  It's smooth and doesn't poke - but I'd like it to be a little cleaner looking.  I'm going to try and refine it a little.  Then maybe I'll try my hand at a tutorial for it.  Until then - I love wearing this silly (but sophisticated) ring!

Wire Ring Tutorial link

It's always nice to find a well explained tutorial - and this one really does the job well.  Step by Step pictures and a really nice result.  It is very similar to my simple ring, except it wraps the center stone.  It looks very nice  and this style is simple to master.  Here's the link to the tutorial at Lytha Studios: Simple Wire Wrapped Ring Tutorial .  I'll make a few and post them this weekend when I have my picture studio set up.  If you make some, you can send me the pictures or a link to them and I'll be glad to add them here.

Braided Wire Band

Image
A new simple ring style.  This is made from 26g wire, braided and then joined in the back.  No picture of the join - it's not especially neat, but it is comfortable and it has grown on me.  I really like the ring stacked with my other simple rings.  It's comfortable.  The ring is hammered on the mandrel to flatten the join and the braid.  I didn't use all 3 wires from each side to make the wrap like you might expect.  I tried that at first, but the wrap was waaaay too big.  Instead, I clipped two wires from each side at the join and left one wire on each side long.  The long wire from each side was used to join the two sides and wrap over the join. Here is the ring as part of a stack.  The other style is the simple ring I previously made, but with a heavier gauge wire.  I think it is 20g which is much thicker than I usually use.  I also added some small silver beads on the side.  Click on the pictures to enlarge them.

Helping Others With Your Craft

I promised some new rings last week and I did make them.  This is not your typical  "but the dog ate my homework" story.  It's a story of how your craft talent can help others, and I really want to share it - in hopes that you will share too. There is a girl at my children's middle school who was recently diagnosed with cancer.  It is a rare cancer and understandably - she is too young and vibrant to have something like this happen to her.  But, it has happened, and there is nothing we can do but accept it.  But, we all know that nothing can help someone feel strong enough for a goliath fight than knowing that other people support you and stand ready to help. So, last weekend, that was where all my rings went.  I packed them in a box, about 100 of them, and brought them to a community event to help raise money for her.  Today, I looked at the pictures from the event on facebook , and it brings tears to my eyes.  So many people hope the best for Jessica and her fam

New Rings Coming Soon!

After a flurry of activity making rings the entire months of December and January, I just had to take a little time to breathe and try something different.  I joined the Year of Jewelry challenge and it really has kept me motivated and focused.  You can see my projects on my other blog .  But, my sketch pad has some new simple ring designs, so I'm going to make at least one this weekend.  I'll also try to take pictures as I'm making them - a new ring and a tutorial all in one.  Yay!

Simple Ring Design

Image
This is one of the simplest ring designs that I make. I use whatever size wire fits in the beads best.  I thread the beads on the wire and wrap it around the ring mandrel twice. Then I bend the wire a little to keep the beads in place and remove it from the mandrel.  This is the most difficult part - keeping the beads snug and keeping the wire ring from getting larger.  Then I wrap the wire tails around the ring wires a few times and snip the ends. I know I should draw a picture or take a few pictures while I'm making one - but I'm not prepared to do that today.  I'll do it the next time my photo studio is set up.

Wire Basics: Gauge / Diameter

Before you can buy your wire to make rings, you'll need to know a little bit about wire gauge.  The gauge is the diameter of the wire.  Typical wire gauges used in jewelry making range from 32 gauge (abbreviated g) to 10 gauge.  The higher the gauge, the thinner the wire will be.  It would be difficult to make a wire ring with anything thinner than 26 gauge. Unfortunately, I can't say there is a 'typical' size wire for rings.  A big part of the reason for this blog is to experiment with designs using different types, sizes, colors of wire and different types of beads.  For now, know that you will need multiple sizes of wire in order to make rings.  I typically use 18-26g but I know lots of people who prefer heavier jewelry and don't use anything thinner than 22.  Invest in a few different sizes and you can't go wrong. Let me know what size wire you typically use for rings.  I love get different ideas!

Wire Needed to Make Wire Rings

Image
Before you can start to make wire rings, you will need some wire.  Ideally, you want some jewelry grade wire.  There are so many options these days, it is really easy to get started with this as a hobby.  Your choice probably depends on the look you want to achieve or on your eventual jewelry making goals.  I recommend you consider the following types of wire to start learning: - Colored Craft Wire: These are usually copper base with a (semi) permanent layer of color.  The color can scratch off though, so you need to be careful.  It's a good way to learn to be careful with your tools.  Some to try are Artistic Wire  by Beadalon or ParaWire . - Copper Wire:  Just like it sounds, this is solid copper wire.  If you want to save money you can buy electrical wire by the yard at a Home Center and strip it.  If you buy the really thick wire, you'll find that you'll get several different gauges at once.  I'll have to post more about this later. - Sterling or Gold-Plated wire

10 Reasons for the Make Wire Rings Blog

1.  To improve my jewelry making skills 2.  To explore a particular style (rings) to its fullest possible extent 3.  To have a visual diary of how small changes impact a final design 4.  To provide design alternatives when you don't have the materials a design calls for 5.  To help others learn to make wire rings 6.  To expand my creativity and help others do the same 7.  To dedicate my time towards a goal 8.  To meet other people who like to make jewelry 9.  To get feedback on my designs and concepts 10. To provide (and get) helpful tips that make jewelry making easier and more satisfying or improve the final result. I hope you share at least some of my goals when you are reading this blog.  Please take the time to tell me what your goals are in reading this blog and in jewelry making so I can make it as helpful and fun to read as possible.